Maintenance and Care Instructions for XCMG XP305 Road Roller
Part 2
The long winter is coming to an end, and construction sites are about to resume operations. But before your rubber-tired roller shines, don’t forget to give it a proper maintenance check. This article will provide you with maintenance and care instructions for theXCMG XP305 roller.
Monthly Maintenance (250 working hours)
Change engine oil and oil filter
Run the engine until the coolant temperature reaches 60°C, then turn it off. Place a 20-liter container of used oil on the ground below the engine oil drain plug. Unscrew the filler cap and drain plug to allow the hot oil to drain.
Simultaneously replace the oil filter. Use a belt wrench to unscrew the oil filter element. Clean the sealing surface of the filter housing, removing any residue from the old oil filter seal. Before installing the oil filter, inject clean lubricating oil into the filter. Lightly coat the new seal with a thin film of oil. Screw the new filter element in by hand until the seal is in place, then tighten it half a turn. Clean the oil plug and re-tighten. Add approximately 12 liters of lubricating oil. Check the oil level with the dipstick; it should be between the upper and lower marks. Screw on the filler cap, start the engine to warm it up, and check for any leaks.
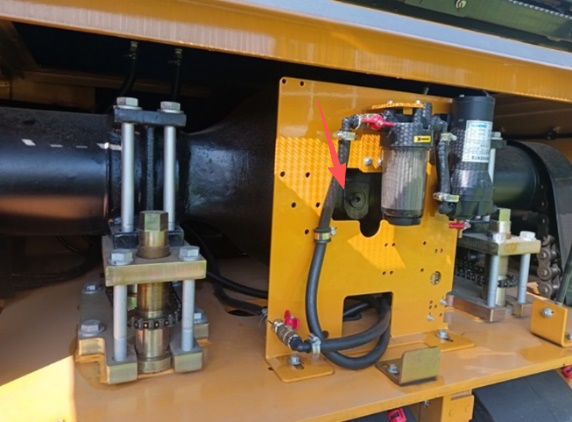
Check the drive axle oil level
Check the drive axle oil level: Park the roller on a level surface, press the parking brake button, and turn off the engine. First, clean and unscrew the drive axle oil level plug. If the oil level is below the lower edge of the plug hole, add oil through the filler neck on top of the axle housing until oil overflows. Alternatively, add oil through the plug itself, cleaning any metal particles from the plug. Tighten the plug, drive for 2 minutes, then stop for 10 minutes. Check the oil level again and add oil as needed.
Check and clean the radiator
Regularly, or when cooling is poor, check the radiator surface for cleanliness. If necessary, clean the radiator with compressed air, ensuring the maximum compressed air pressure does not exceed 500 kPa. Using a steam jet cleaner is even more effective.
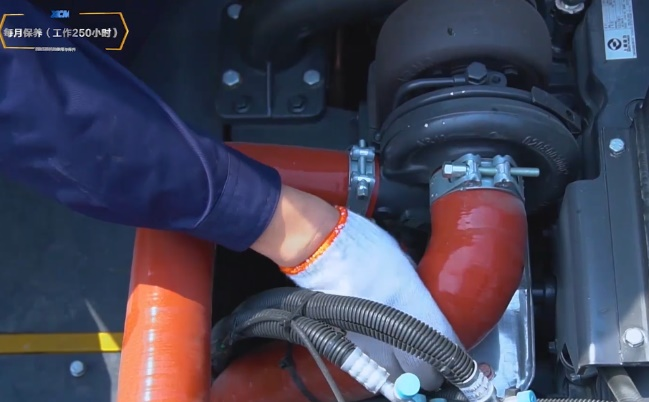
Check the intake pipe
Inspect the intake pipe for cracks or damage, and ensure the connections are secure. Replace the intake pipe or tighten the connections if necessary.
Check the transmission fluid level
Park the road roller on a level surface, press the parking brake button, and let the engine idle. Remove the bolts from the cab floor plate, lift the cover, pull out the torque converter dipstick, wipe it clean, and then put it back in place. Pull out the torque converter dipstick again to check the fluid level; it should be between the high and low marks. If the fluid level is close to or below the low mark, add hydraulic transmission fluid promptly. It is best to use a refueling truck with a 20µm filter.
Quarterly Maintenance (500 working hours)
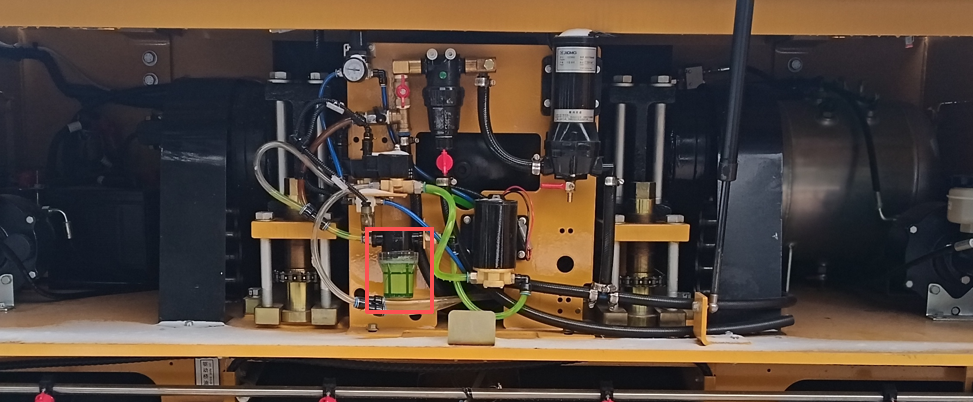
Replace the hydraulic oil filter
The hydraulic oil filter is located in the hydraulic oil tank. Drain the hydraulic oil from the tank, remove the side cover of the tank, remove the filter and discard it in the waste bin. Install the new filter, reinstall the side cover, add hydraulic oil, start the engine, check and ensure there are no leaks at the filter port, check the hydraulic oil level in the tank, and add fluid as needed.
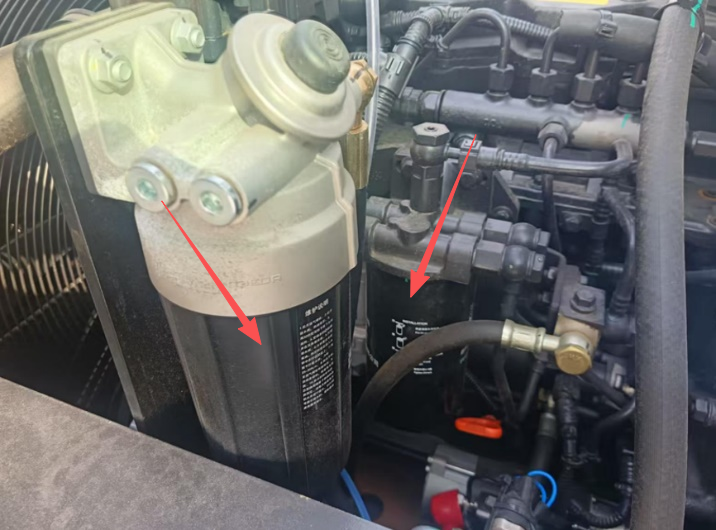
Replace the engine fuel filter
Unscrew the diesel filter and oil-water separator (note that oil may flow out). Clean the sealing surfaces and lightly apply a layer of clean diesel fuel to the new sealing ring. Before installation, inject clean diesel fuel into the filter. Tighten the new filter element by hand or with a belt wrench until the sealing ring is fully fitted, then tighten it another half turn. Bleed the fuel system and start the diesel engine to check for leaks.
Replace the spray filter
The sprayer uses neutral oils such as vegetable oil, which have high viscosity and are prone to clogging. To ensure smooth operation, the spray filter needs to be replaced.
Semi-annual maintenance (1000 working hours)
Change the drive axle lubricating oil
The drive axle lubricating oil needs to be changed after the first 50 hours of use, and then every 1000 hours thereafter. A better method is as follows: Park the roller on a level surface, press the parking brake button, and turn off the engine. Place a small bucket under the drive axle drain hose opening and wipe the area around the drain plug clean. First, unscrew the filler plug on top of the drive axle, then unscrew the drain plug. Once the dirty oil has drained completely, tighten the drain plug. Add clean gear oil through the filler neck until it overflows from the filler neck. Tighten all filler plugs (replace the seals if necessary). Drive for 2 minutes, then stop for 10 minutes and check the oil level again. Add oil as needed if necessary.
Change the transmission oil
Change the transmission oil after the first 50 hours of use, and then every 1000 hours thereafter. Park the roller on a level surface, press the parking brake button, and turn off the engine. Pull out the dipstick. Place a small bucket under the transmission drain hose and wipe the area around the drain plug clean. Unscrew the drain plug and, once the dirty oil has drained completely, tighten the drain plug. Add clean gear oil through the filler neck. 1. Tighten the oil plug (replace the sealing ring if necessary), allow the engine to idle for 2 minutes, and check the oil level with the dipstick, following the instructions in the monthly maintenance. Add oil as needed if the level is low.
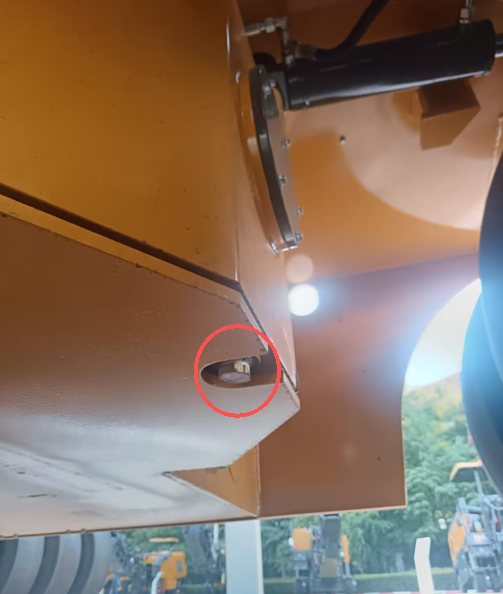
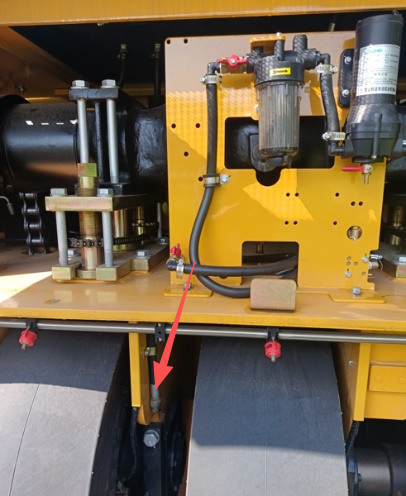
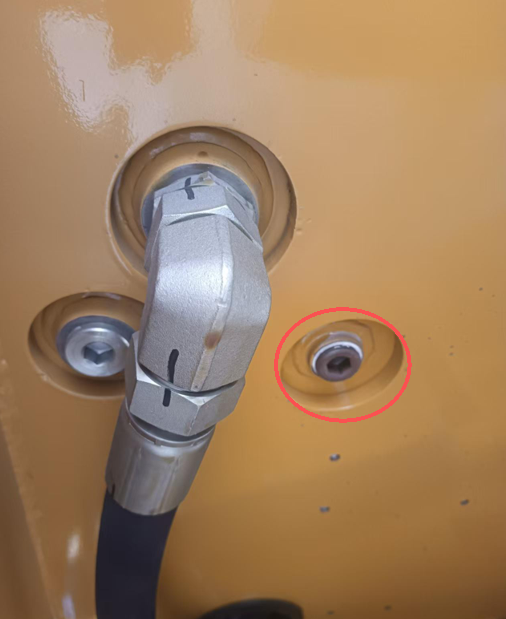
Drain condensate and sediment from the diesel and hydraulic oil tanks
Park the roller on a level surface, press the parking brake button, and turn off the engine. Unscrew the drain plug (place a container with a capacity of approximately 30 liters underneath), drain the condensate and sediment from the tanks, and clean any dirt from the magnetic drain plug until clean diesel fuel flows out. Immediately replace the drain plug.
Annual Maintenance (2000 working hours)
Change the hydraulic oil
Allow the engine to cool down. Place a container with a capacity of at least 40 liters under the hydraulic oil tank on the chassis, open the drain plug of the hydraulic oil tank, and drain all the hydraulic oil from the tank. Replace the hydraulic oil and hydraulic oil filter simultaneously. Add qualified hydraulic oil to the appropriate level on the oil level gauge, replace the cap on the hydraulic oil port, and check for leaks.
Two-Year Maintenance (4000 Working Hours)
Park the roller on a level surface, press the parking brake button, and place small buckets under each brake hose connector. Wipe clean the hose connectors, brake connectors, and around the hollow bolts. Unscrew the brake hoses and hollow bolts, remove the brake connectors, and unscrew the brake bleed valve to allow all brake fluid to drain. Clean the brake caliper ports.
Tighten the hollow bolts, brake connectors, brake bleed valve, and brake lines. Add brake fluid to the brake booster cylinder reservoir. Clean the brake lines and components. After draining all brake fluid from the system again, tighten all lines and connectors to bleed the brake system.
It is important to note that equipment that has been shut down for an extended period requires extra care during restarting, and the correct operating procedures must be followed.
Our Advantages
China Construction Machinery Imp&Exp Co., Ltd., we specialize in delivering premium XCMG construction machinery and spare parts to global partners. Such as Indonesia, Zimbabwe, Papua New Guinea, Ghana, South Africa and so on.
With over 15 years of industry expertise, we provide tailored solutions for the following XCMG construction machinery:
(1)Earth moving machine: Excavator, Wheel loader, Bulldozer;
(2)Road building machine: Road roller, Motor Grader, Asphalt paver;
(3)Lifting machine: Truck crane, Truck mounted crane, Aerial working vehicles.
Whether you need equipment for mining projects or for urban infrastructure, we will recommend suitable machine model recommendations based on your specific engineering environment.